What is ImageJ?
![]() ImageJ is public domain software for processing and analyzing scientific images.
ImageJ is public domain software for processing and analyzing scientific images.
What is ImageJ2?
![]() ImageJ2 is a new version of ImageJ for multidimensional image data, with a focus on scientific imaging. It includes some additional features not available in the original ImageJ.
ImageJ2 is a new version of ImageJ for multidimensional image data, with a focus on scientific imaging. It includes some additional features not available in the original ImageJ.
What is Fiji?
![]() Fiji Is Just ImageJ—a “batteries-included” distribution of ImageJ and ImageJ2 which includes many useful plugins contributed by the community.
Fiji Is Just ImageJ—a “batteries-included” distribution of ImageJ and ImageJ2 which includes many useful plugins contributed by the community.
What does ImageJ provide?
| Application | A user interface with functions to load, display, and save images. |
| Techniques | Image processing, colocalization, deconvolution, registration, segmentation, tracking, visualization and much more. |
| Plugins | A powerful mechanism for extending ImageJ in all kinds of useful ways. |
| Scripting | Automated, reproducible workflows via scripts and macros. |
| Forum | A vibrant, diverse, and helpful user community. |
ImageJ’s extensibility is the root of its effectiveness: many advanced image-processing methods are not provided by the core application, but rather are plugins written by specialists in specific fields, made available via ImageJ2 update sites.
How do I get started?
Installation
First, you should download and install ImageJ, ImageJ2, or Fiji!
The main window
After starting the program, you will see the main window:
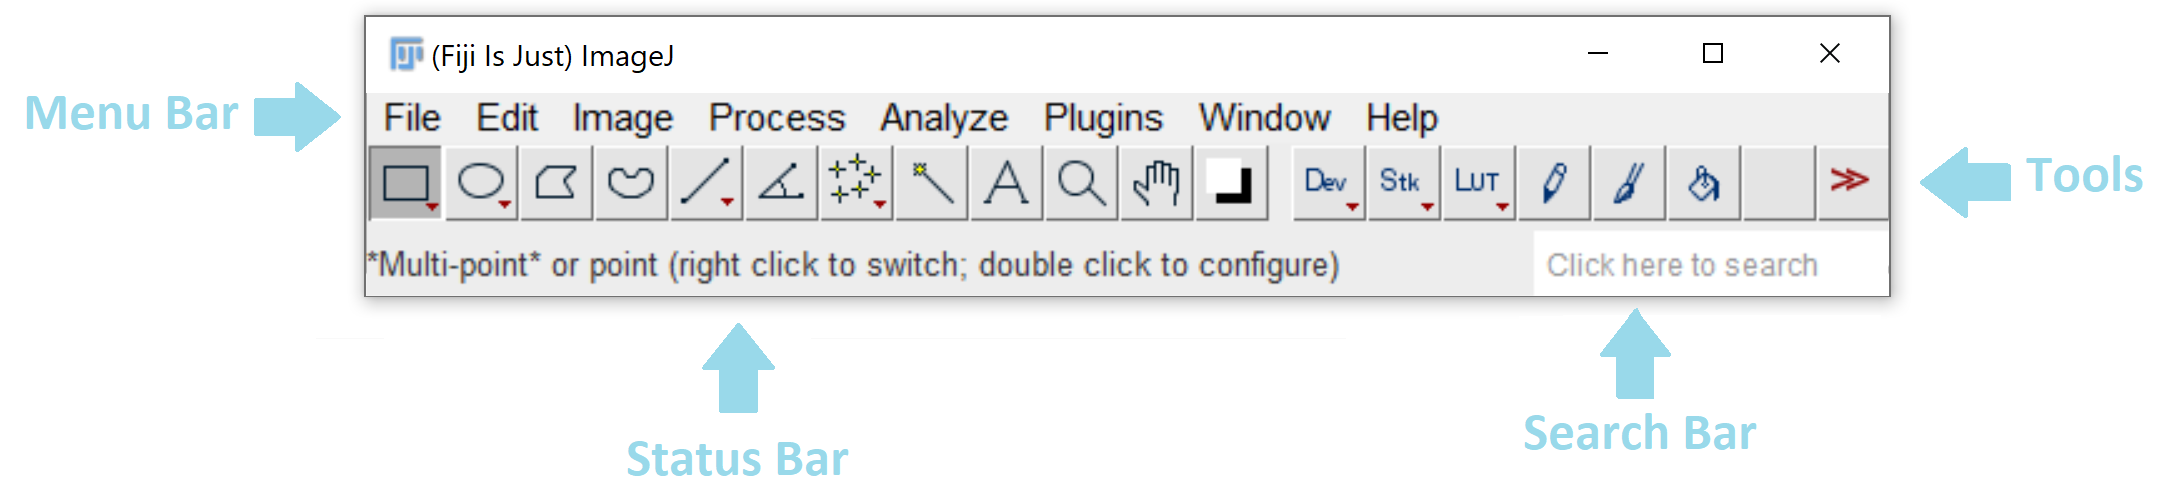
On macOS, the menu bar will appear on the top of the screen (as with all macOS applications).
The search bar
The original version of ImageJ does not have a search bar, but you can bring up the Command Finder, with some similar capabilities, by pressing the same keyboard shortcut: ⌃ Ctrl / ⌘ ⌃ Ctrl on a PC ⌘ command on a Mac + L
The search bar is a convenient way to quickly find and launch commands, search for documentation, and more. The search panel can be brought up by clicking and typing into the search bar, or via the keyboard shortcut ⌃ Ctrl / ⌘ ⌃ Ctrl on a PC ⌘ command on a Mac + L
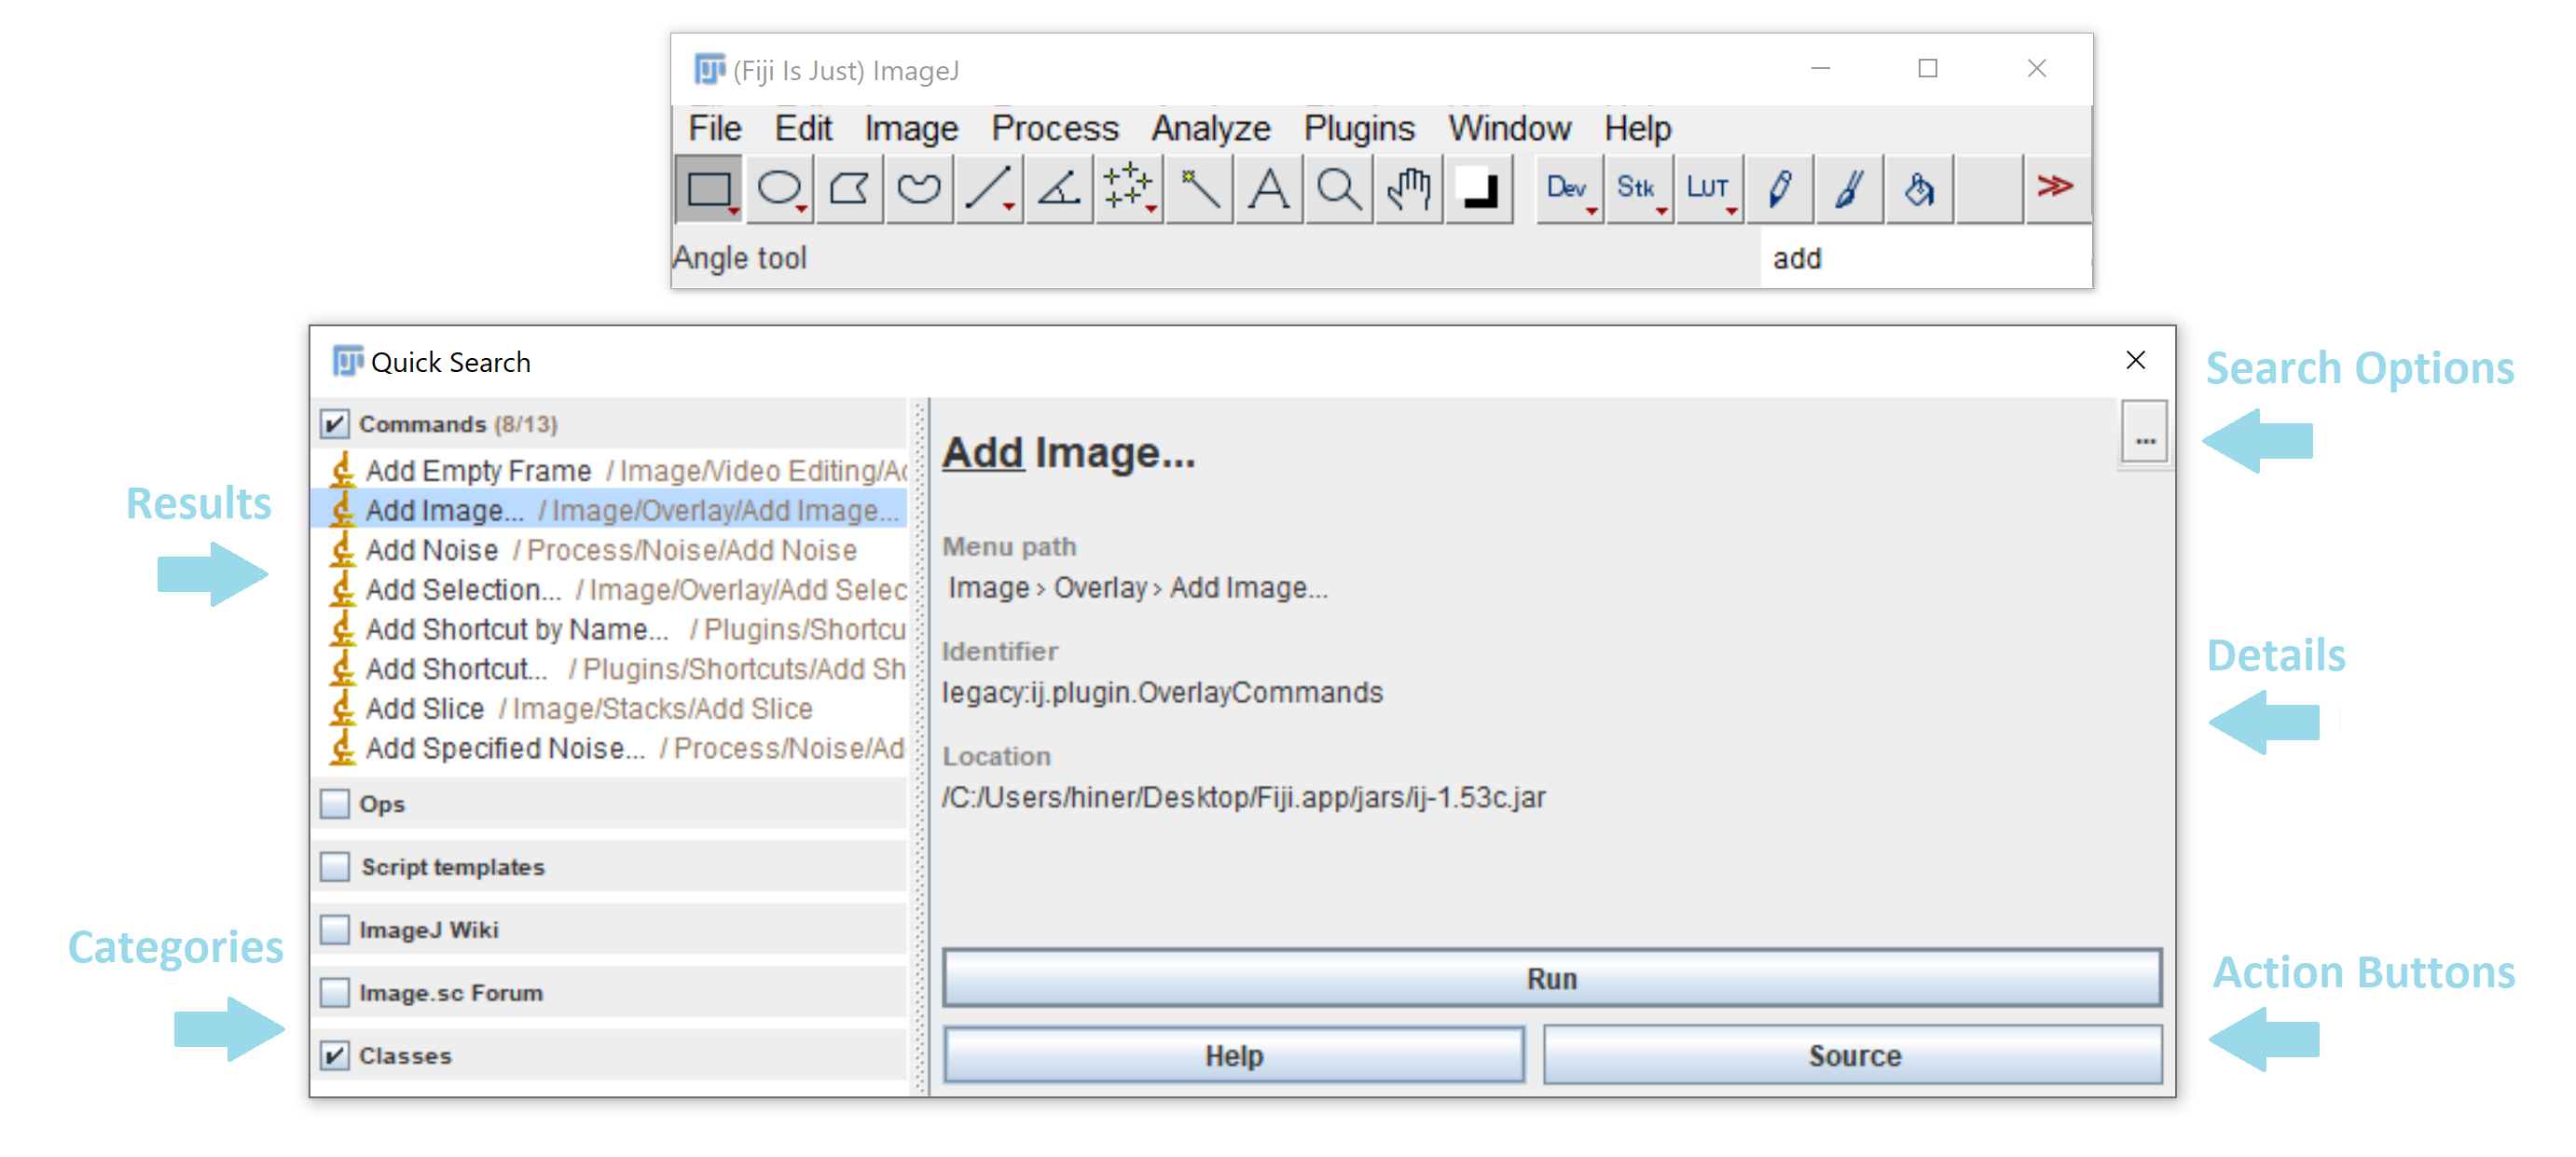
Results
These are the plugins/commands that match your search query, sorted by type of result. Results can be navigated with the mouse or arrow keys, and the highlighted command can be executed with ↵ Enter or double-clicking.
Categories
Categories can be (de)selected as desired to expand or restrict the scope of your search, as desired.
Search Options
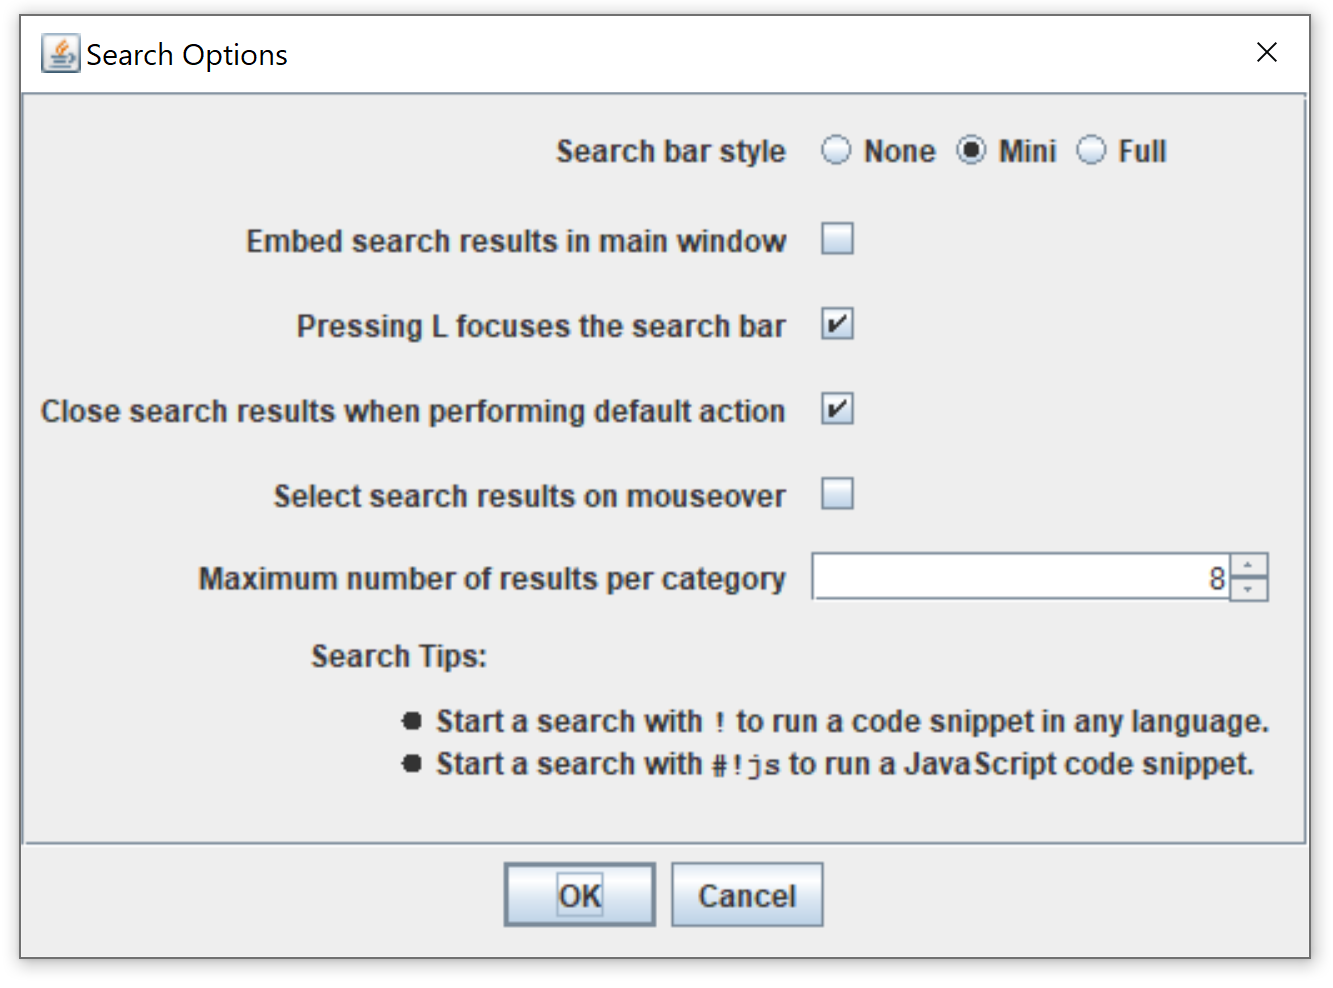
The ... button opens a panel with more options for controlling your search behavior.
Details
The details panel provides more information about the selected search result.
Action Buttons
These buttons can be used to take alternative actions (beyond just running a given command) such as opening the plugin’s source or wiki page.
The menu bar
In the menu bar, you will find most of the functionality, such as loading/saving files, processing them, and plugins will be installed into the menus, too.
The menus have different purposes:
| File | File input/output, new files |
| Edit | Selection/ROI handling |
| Image | Visualization, stack manipulation |
| Process | Image filters |
| Analyze | Statistics |
| Plugins | Plugins, Macros and Utilities |
| Window | Windows |
| Help | Help & Links |
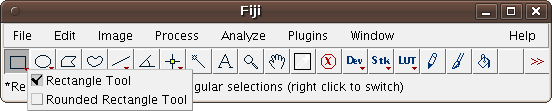
The tool bar
The toolbar mostly contains selection tools: the rectangle, ellipse, polygon, freehand and straight line selection tool. By clicking on the icon, you activate the tool.
Some tools offer option dialogs which you can open by double clicking the icon. This example shows the option dialog of the Oval Tool:
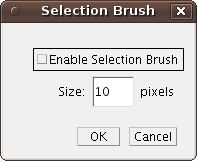
If there is a small red arrow in the lower right corner of the tool icon, you can right-click (⌃ Ctrl +  Left Click on an Apple mouse) and select an alternative selection tool (e.g. a circular brush selection tool which shares the icon with the ellipse selection tool). Example:
The status bar
The status bar displays useful information at startup, and when running plugins. It also shows a progress bar on the right side for long-running processes:

A single mouse click on the status bar will show the information about ImageJ and Java version as well as about memory consumption:

Drag & Drop
You can drag files from your favorite file manager and drop them on the main window; ImageJ will load the corresponding files.
Drag ‘n Drop will also work for images displayed in your web browser, unless they are links to other web pages. You can try with images from this page.
Image windows
Whenever you open an image, be it via File › Open, Drag ‘n Drop or File › Open Samples, ImageJ will open an image window.
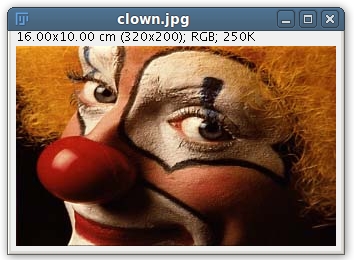
The window has the file name as title, and it display some useful information above the image: the real resolution (in this case in square centimeters), the pixel resolution, the image type and the memory required by the image.
If your image does not have meta-data about the real resolution, you can set the resolution explicitely with Image › Properties… or by following the tutorial on spatial calibration.
Image Types
You can change the image type:
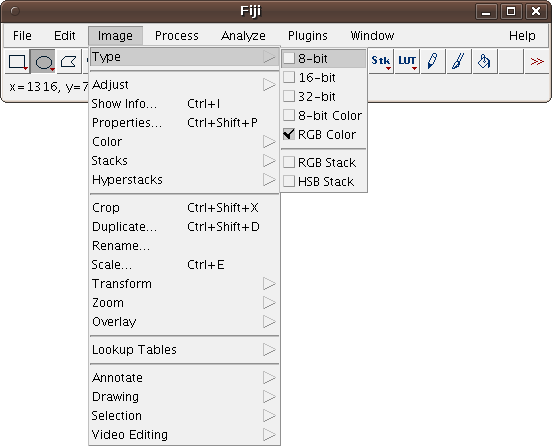
Choose between
- 8-bit (intensity range 0..255)
- 16-bit (intensity range 0..65535)
- 32-bit (floating point numbers)
- 8-bit color (up to 256 colors encoded via a color lookup table)
- RGB color (3 colors encoded as 8-bit values)
There are two more options: RGB stack and HSV stack, which can turn a 2-dimensional color image into a stack consisting of 3 color channels (red, green & blue or hue, saturation & value, respectively).
Further reading
Peruse the user guides, additional tutorials, and presentations.