JRuby is a marvellous project that created a complete implementation of Ruby that runs in the JVM. The excellent work of the authors of JRuby has made it very simple for us to add JRuby scripting into ImageJ.
JRuby scripting in ImageJ is a nice alternative to scripting using ImageJ’s macro language. It has the following advantages:
- You don’t have to learn a new language to script ImageJ (assuming you know Ruby)
- You’re not limited to using the functionality exposed by the macro language: you can use any class in ImageJ, one of its plugins or standard Java classes
- Developing JRuby scripts is very fast compared to developing plugins in Java
These advantages, of course, are shared by all the scripting languages available in ImageJ2, including Jython, Clojure, BeanShell and JavaScript.
If you have any questions or suggestions about JRuby scripting in ImageJ, please contact the Image.sc Forum. Have fun!
Tutorial
Let’s start writing some JRuby right away—start up the interpreter by going to Plugins › Scripting › JRuby Interpreter. The interpreter window will pop up, but it may take a little time for the JRuby runtime to be ready. You should initially see the message:
Starting JRuby ...
… and when it’s ready, the line:
Done.
Now you can start typing Ruby expressions into that window, such as:
>>> "hello there".upcase[1..4]
ELLO
It would be a good idea to take a quick look at the page on Scripting Help for tips on using this interpreter window.l
Try loading one of the ImageJ sample images by going to File › Open Samples › T1 Head (2.4M, 16-bits). Once you’ve done that we’ll examine the image using JRuby. You can get a reference to the current image with ij.IJ.getImage. Try assigning the result to a variable, like this:
>>> i = ij.IJ.getImage
imp[t1-head.tif 256x256x129]
Now we can find out the width and the depth of the stack like this:
>>> w = i.getWidth
256
>>> d = i.getStackSize
129
Many of the operations that you might want to perform on the image are available via the ImageProcessor associate with a slice. For example, to invert the current slice do:
i.getProcessor.invert
That won’t actually produce a visible effect on the image until you also call i.updateAndDraw on the image:
i.updateAndDraw
If you scroll through the stack now you should find that one of the slices is inverted.
Note On Names
You might find the use of ij.IJ.getImage above slightly suspicious if you’re used to Java and the ImageJ API. ij is the Java package name, IJ is the class name in that package and getImage is a static method in that class which returns a reference to an ImagePlus object representing the current image or null if there is none. How does this work? We have set up the JRuby interpreter in ImageJ so that if a method or class name can’t be found it will look for a correponding class or method name in the ij.* packages. JRuby by default does exactly this for the java.* classes, so for example the following works without having to explicitly include the java.util.Random class:
>>> rng = java.util.Random.new
java.util.Random@bf9a12
>>> rng.nextInt 1024
603
>>> rng.nextInt 1024
94
Note that this is an example of creating an object in JRuby; you use the usual Something.new syntax of Ruby, but it creates an object of the standard Java class. Hopefully you’re thinking “Excellent!” or something similar at this stage…
Importing classes
If you need to use classes that aren’t in the java.* or ij.* hierarchy—or if you are developing JRuby scripts in the Script Editor of ImageJ2—you will have to include them explicitly.To reference Java classes from JRuby you will need to import them.
Unlike the original ImageJ, ImageJ2 (and therefore Fiji) does not automatically import any classes. Consequently, scripts written for ImageJ will not run in ImageJ2 without adding the proper imports. The rationale is that the auto-import feature is not safe. What if two classes of the same name live in two different packages? Or if a new class is introduced that makes formerly unique names ambiguous? All of a sudden, all of the scripts that reference the original class no longer work. In short: auto-imports are dangerously imprecise.
For example, in the classpath of Fiji there is a useful class called util.BatchOpener, that has static methods for opening files as arrays of ImagePlus objects (one per channel) without showing them. To use these methods, you would have to do:
>>> java_import 'util.BatchOpener'
util.BatchOpener
Then you can, for example, do the following:
>>> a = BatchOpener.open "/home/mark/confocal/test.lsm"
[Lij.ImagePlus;@b1406b
>>> a.length
2
>>> a[0].getTitle
C1-test.lsm
>>> a[1].getTitle
C2-test.lsm
>>> a[1].show
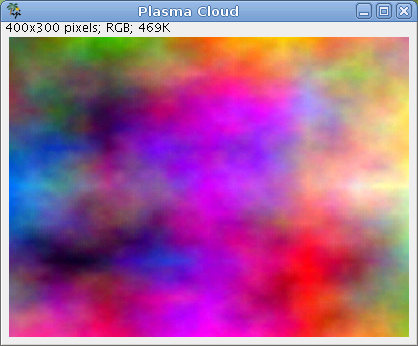
Example: Generating a Plasma Cloud
In this first example, we’ll just create a small script to create a fractal “plasma cloud” image. We’ll start of experimenting in the interpreter to make sure we’ve got the code to create images correctly. To create the RGB image in the first place, we create a ColorProcessor and then an ImagePlus from that:
>>> w = 800
800
>>> h = 600
600
>>> cp = ij.process.ColorProcessor.new(w,h)
ip[width=800, height=600, min=0.0, max=255.0]
>>> i = ij.ImagePlus.new "Plasma Cloud", cp
imp[Plasma Cloud 800x600x1]
… and now show it:
>>> i.show
We’ll manipulate the pixel array directly, so it’s worth checking that this will work OK. Here we try to set half of the image to green:
>>> i
imp[Plasma Cloud 800x600x1]
>>> pixels = cp.getPixels
[I@e038c4
>>> 0.upto( w * (h / 2) - 1) { |j| pixels[j] = 0x0000FF00 }
0
>>> i.updateAndDraw
Hopefully that worked OK. The color value specified there is in ARGB format. You may have noticed that this step was rather slow - there is quite a bit of magic involved in JRuby’s transparent access between Ruby and Java, which has an inevitable performance cost. But if your goal is not so much the speed with which the script is executed, but to get a working script as fast as possible, JRuby scripting may well be your optimal tool.
(By the way, sometimes it’s even possible to use java’s optimizations in ruby. Replace the
0.upto( w * (h / 2) - 1) { |j| pixels[j] = 0x0000FF00 }
with
java.util.Arrays.fill(pixels, 0, w*h/2 - 1, 0x0000FF00)
and get a free 240 times speedup.)
You would probably proceed at this stage by switching to a text editor and creating a script with the extension “.rb” and underscores in the name in the Fiji plugins directory. You should find an example Plasma_Cloud.rb script in plugins/Examples which is based on the basics we worked out above. The output of this script looks like this:
Example: Batch Converting File Formats
This is a short example script showing how to convert a directory of LSM files into BioRad .PIC format using JRuby and the util.BatchOpener methods that I mentioned above. This just hard-codes the paths in the filesystem, so you would need to edit it if you want to do something similar. Nonetheless, hopefully this is instructive: filtering filenames, and so on, is typically much more convenient using JRuby than the ImageJ macro language:
input_directory  = "/home/mark/lsm-examples/"
output_directory = "/home/mark/lsm-examples/biorad/"

include_class 'util.BatchOpener'
include_class 'Biorad_Writer'

# Check that the input directory exists:
unless FileTest.directory? input_directory
  ij.IJ.error "Input directory '#{input_directory} was not found"
  exit(-1)
end

# Create the output directory if it doesn't exist:
unless FileTest.exist? output_directory
  Dir.mkdir output_directory
end

# Biorad filenames have a standard format, which we generate with
# this function.  ('channel' should be 1-indexed):
def make_biorad_filename(lsm_filename,channel)
  lsm_filename.gsub(/.lsm$/,sprintf("%02d.pic",channel))
end

Dir.entries(input_directory).each do |e|
  # Skip anything that doesn't have a '.lsm' extension:
  next unless e =~ /\.lsm$/
  puts "Converting: #{e}"
  # Open the image file to an array of ImagePlus objects:
  a = BatchOpener.open("#{input_directory}#{e}")
  # Create the writer plugin object:
  writer = Biorad_Writer.new
  # Now, for each channel in the input image, write out
  index = 0
  a.each do |image|
    # The Biorad_Writer doesn't like COLOR_256 images, so convert to
    # GRAY8:
    ij.process.StackConverter.new(image).convertToGray8
    biorad_filename = make_biorad_filename e, index + 1
    puts "    Writing: #{biorad_filename}"
    writer.save image, output_directory, biorad_filename
    index += 1
    image.close
  end
end

ij.IJ.showMessage("Finished converting to Biorad format!")
Converting ImageJ Macros to JRuby
To help with porting existing ImageJ macros to JRuby, I have made a start on implementing similarly named JRuby functions to the standard ImageJ macros. These have been defined with idiomatic Ruby function names as well as the “lower camel case” style ImageJ macro names, so instead of image = ij.IJ.getImage as used above, you can use either:
image = getImage
or:
image = get_image
The run method may also be particularly useful for calling existing ImageJ plugins and commands. The next section has an example of the use of this. It may be instructive to compare the “Blobs Demo” macro from the ImageJ distribution with a version ported to JRuby. The use of the analogous function in JRuby is not always the same—for example, if you compare the invocation of getSelectionCoordinates, you’ll find that whereas the ImageJ macro version passes in the output variables:
getSelectionCoordinates(xCoordinates, yCoordinates);
… the JRuby version can return two arrays:
x_coordinates, y_coordinates = get_selection_coordinates
A note for the interested programmer: About 15% of the macro functions have be done so far, and if anyone wanted to help out with doing the rest, that would be excellent! The source code can be found here.
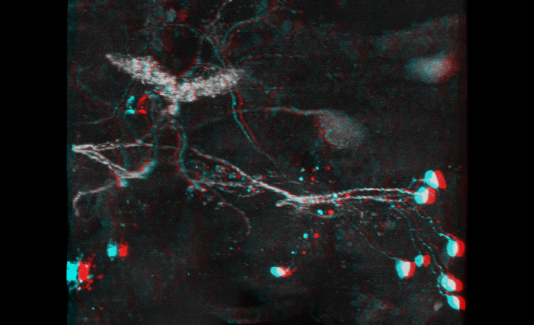
Example: Generating Red/Cyan Anaglyphs
This example script can be found in the plugins/Examples/ folder of Fiji. It will take an image stack and generate from it an image that should appear in 3D when viewed through red and cyan glasses. All that this does is to do two maximum intensity projections from two slightly different angles and merges them together. It’s a nice example because all the work is done by existing ImageJ commands. If you look at the script, you’ll see that the first step is to run the “3D Project…” plugin with some slightly convoluted options:
projection_options = "projection=[Brightest Point] axis=Y-Axis "
projection_options += "initial=-#{degree_separation / 2} "
projection_options += "total=#{degree_separation} "
projection_options += "rotation=#{degree_separation} "
projection_options += "interpolate"

run "3D Project...", projection_options
In general, the best way to figure out what these options should be is to start the macro recorder with Plugins › Macros › Record… and run the plugin. In this case, the output in the macro recorder looks like this:
run("3D Project...", "projection=[Brightest Point] axis=Y-Axis slice=1.20 initial=-2 total=4
              rotation=4 lower=1 upper=255 opacity=0 surface=100 interior=50 interpolate");
Hopefully it should be obvious how I derived the projection_options string in the script from that output. The next part of the script splits the hyperstack generated by that command and merges it with appropriate colours. Similarly this can be figured out with the help of the macro recorder, the only tricky bit being that one has to predict the names of the images that are output from each step. There are further helpful comments in the script itself.
Some example output:
Script Parameters
When using Script Parameters, e.g., in the Script Editor, you need to use a $ before @ variables, due to a limitation in the scoping, as in this example from Script Templates:
Library
The Fiji distribution of ImageJ includes a library called imagej.rb for convenience. It contains a number of useful functions related to ImageJ. It is loaded by default when creating a new JRuby script in the Script Editor.
What next?
You may want to first have a quick look at the Scripting Help page for generic instructions in using the interpreter and script interfaces, and the Scripting comparisons page for an example written in several of the different scripting languages available. The JRuby example shows how to implement a Java interface in JRuby.
JRuby offers some more nice features, have a look at them in the JRuby documentation.
And of course, if you want to know how to use a class from ImageJ or any of its projects, visit javadoc.scijava.org.